How to do water damage restoration starts with one simple rule: stop the water, remove the moisture, and dry the property before mold and structural damage get worse. In Arlington, where heavy rain, plumbing leaks, appliance failures, and basement flooding can happen fast, water damage is not something to ignore or guess your way through. VIP Restoration Services helps homeowners and business owners handle water emergencies with the right drying methods, cleanup process, and restoration plan.
Let’s cut to the chase. If the water is minor, clean, and limited to a small area, you may be able to handle the first few safety steps yourself. But if water has soaked drywall, flooring, insulation, cabinets, ceilings, or carpets, you need professional help. Water hides behind walls and under floors. A room can look “dry” while moisture is still trapped inside building materials. That hidden moisture is what causes mold, swelling wood, musty odors, and long-term repair costs.
Key Takeaways
- Water damage restoration should start as soon as the area is safe to enter.
- The first priorities are safety, stopping the water source, and removing standing water.
- Drying is more than using towels and fans; trapped moisture needs proper equipment.
- Mold can become a serious issue when wet materials are not dried quickly.
- Professional restoration is the safer choice for sewage water, flooding, large leaks, or hidden moisture.
- VIP Restoration Services can help Arlington property owners restore their space faster and more correctly.
What Water Damage Restoration Really Means
Water damage restoration is the process of returning your home or business to a safe, dry, and usable condition after water enters places it should not be. It includes water extraction, drying, cleaning, sanitizing, damaged material removal, odor control, and repairs.
Here’s what matters: restoration is not just cleaning up water you can see. The real problem is often the water you cannot see.
Water can move into:
- Drywall
- Baseboards
- Subfloors
- Carpet padding
- Insulation
- Wall cavities
- Cabinets
- Ceilings
- Crawl spaces
That is why a wet vacuum and a few household fans are not always enough. They may dry the surface, but they rarely remove deep moisture from the structure.
Step 1: Make Sure the Area Is Safe
Before you touch anything, check for safety risks. Water and electricity are a dangerous mix. If water is near outlets, appliances, electrical panels, or extension cords, stay out of the area until power is shut off safely.
This is what you should do first:
- Turn off electricity if it is safe to access the breaker.
- Avoid standing water if electrical hazards may be present.
- Keep children and pets away from the damaged area.
- Do not walk on sagging floors or ceilings.
- Wear gloves and protective footwear.
- Avoid contact with sewage or floodwater.
If the ceiling is bulging, the floor feels soft, or the water smells foul, do not treat it as a simple cleanup. That is a warning sign that the damage may be serious.
Step 2: Stop the Water Source
You cannot restore the property while water is still coming in. Find the source and stop it.
Common sources include:
- Burst pipes
- Leaking water heaters
- Overflowing toilets
- Broken supply lines
- Washing machine leaks
- Dishwasher leaks
- Roof leaks
- Basement seepage
- Storm flooding
If the issue is plumbing-related, shut off the main water valve. If the damage comes from roof leaks or outside flooding, reduce water entry as much as possible, but do not put yourself at risk.
For Arlington homes, basement moisture can be a common concern after heavy rain. If water is entering from outside, the restoration plan may also need to address drainage, foundation cracks, or sump pump failure.
Step 3: Document the Damage
Before cleanup begins, take photos and videos of everything. This helps if you need to file an insurance claim.
Capture:
- Standing water
- Wet flooring
- Damaged walls
- Affected furniture
- Ceiling stains
- Damaged personal items
- The source of the water, if visible
Do not throw away damaged materials until you have documented them. If cleanup is urgent, take clear photos first, then move forward.
Step 4: Remove Standing Water
Once the area is safe and documented, standing water should be removed quickly. Small amounts may be handled with towels, mops, or a wet/dry vacuum. Larger amounts need professional extraction equipment.
Standing water is a problem because it keeps soaking deeper into the structure. Carpet padding, wood flooring, and drywall can absorb moisture fast. The longer water sits, the more damage it causes.
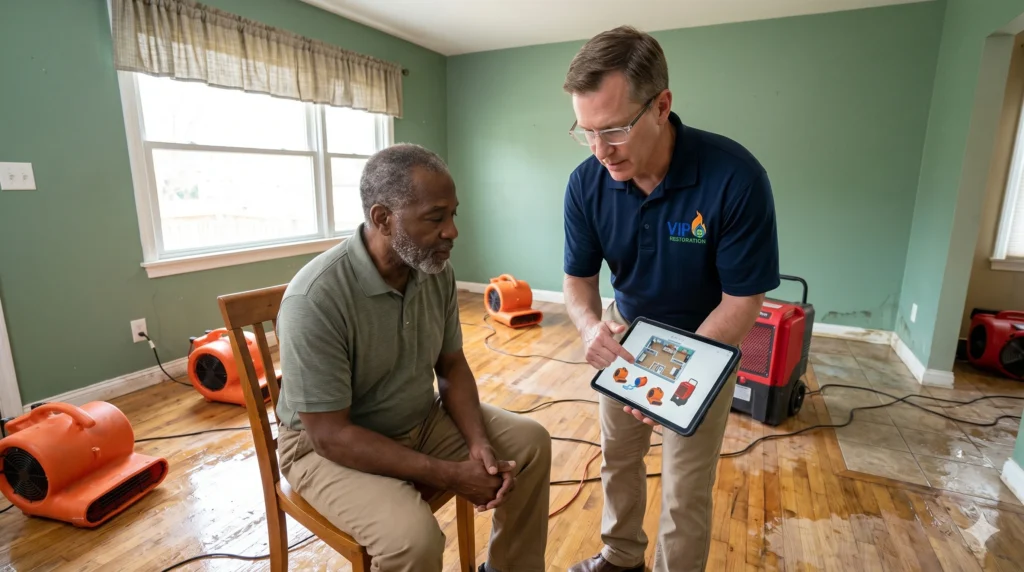
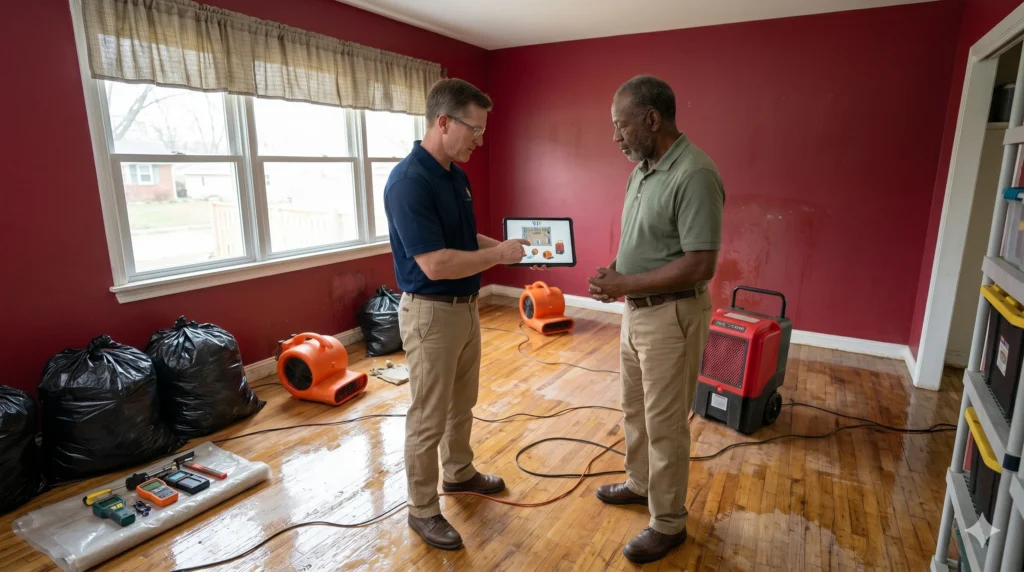
This is one reason many property owners call VIP Restoration Services instead of trying to handle the entire process alone. Professionals use pumps, extraction tools, moisture meters, air movers, and dehumidifiers to remove water and dry materials properly.
Step 5: Remove Unsalvageable Materials
Not everything can be saved after water damage. Some materials may need to be removed, especially if they are heavily soaked or contaminated.
These may include:
- Carpet padding
- Wet insulation
- Damaged drywall
- Warped laminate flooring
- Swollen baseboards
- Contaminated porous materials
- Waterlogged ceiling tiles
Clean water from a pipe leak is different from sewage or floodwater. If the water is contaminated, porous items often need removal because bacteria and odors can remain trapped inside.
A common mistake is trying to save materials that are already ruined. It may feel cheaper in the moment, but keeping wet or contaminated materials can lead to mold, odor, and bigger repairs later.
Step 6: Dry the Structure Properly
This is the part many DIY attempts get wrong. Drying is not just about making the room feel dry. The structure itself needs to be dried.
Professionals check moisture levels in walls, floors, and other materials. Then they place drying equipment based on where moisture is trapped.
Drying may involve:
- Air movers
- Commercial dehumidifiers
- Moisture meters
- Thermal imaging
- Controlled airflow
- Daily monitoring
- Humidity checks
If you are learning how to do water damage restoration, remember this: the drying phase is where long-term damage is either prevented or allowed to grow. A room can look normal while the wall cavity behind the baseboard is still wet.
That hidden moisture can cause mold growth, peeling paint, swollen trim, and musty smells. In worse cases, it can weaken wood and damage structural materials.
Step 7: Clean and Sanitize the Area
After water extraction and drying, the affected area must be cleaned. This is especially important if the water came from a toilet overflow, sewage backup, stormwater, or any source that may carry bacteria.
Cleaning may include:
- Removing dirt and residue
- Sanitizing hard surfaces
- Deodorizing affected rooms
- Cleaning salvageable belongings
- Treating areas for odor control
- Disposing of contaminated materials safely
Never assume water is clean just because it looks clear. Water can carry bacteria, chemicals, and debris depending on the source.
Step 8: Check for Mold Risk
Mold is one of the biggest concerns after water damage. Arlington homes with basements, crawl spaces, and older building materials may be especially vulnerable when moisture is not handled quickly.
Signs of mold risk include:
- Musty odors
- Dark spots on walls or ceilings
- Peeling paint
- Soft drywall
- Persistent humidity
- Allergy-like symptoms indoors
- Damp carpet smell
If you see visible mold or smell a musty odor after a leak, do not ignore it. Cleaning the surface may not solve the problem if moisture is still trapped behind the wall or under the floor.
Step 9: Repair and Restore the Damaged Area
Once the property is dry and clean, repairs can begin. The goal is to bring the space back to its pre-damage condition.
Repairs may include:
- Replacing drywall
- Installing new flooring
- Repainting walls
- Replacing trim
- Repairing cabinets
- Fixing ceilings
- Restoring damaged rooms
- Addressing the original cause of the water issue
This step should not start too early. If repairs are made before the structure is fully dry, moisture can get sealed inside. That creates the perfect setup for mold and future damage.
When DIY Water Damage Cleanup Is Not Enough
A small spill is one thing. A serious leak is another.
You should call a professional if:
- Water covered a large area.
- Water reached walls, ceilings, or floors.
- The leak lasted for several hours or longer.
- The water came from sewage or flooding.
- You smell musty odors.
- You see mold growth.
- Carpet padding is soaked.
- Hardwood or laminate flooring is swelling.
- The ceiling is sagging.
- You are not sure where the water traveled.
This is where knowing how to do water damage restoration has limits. You can take smart first steps, but professional restoration protects the parts of your property you cannot easily inspect.
Why Professional Water Damage Restoration Matters
Water damage gets expensive when it is handled halfway. The visible water is usually only part of the problem. A professional crew checks what is wet, removes what cannot be saved, dries what can be saved, and confirms the area is ready for repair.
VIP Restoration Services uses proven drying methods and works to restore properties as quickly and effectively as possible. For Arlington homeowners, that means faster cleanup, better moisture control, and less guesswork during a stressful situation.
A professional restoration team can also help with insurance-related documentation, which is helpful when the damage is more than a small repair.
Common Mistakes to Avoid After Water Damage
Many homeowners try to move fast, which is good. The problem is moving fast in the wrong direction.
Avoid these mistakes:
Using only household fans
Fans may help with surface drying, but they do not remove deep moisture from walls, flooring, or insulation.
Waiting to see if it dries on its own
Water damage rarely fixes itself. Moisture trapped under floors or behind walls can stay there.
Painting over water stains
Paint hides the stain, not the moisture problem. The stain can come back, and mold may keep growing behind the surface.
Keeping wet carpet padding
Carpets may sometimes be cleaned, but soaked padding often holds water and odor.
Ignoring the source
If you do not fix the leak, the same damage can happen again.
Handle Water Damage the Right Way
Understanding how to do water damage restoration helps you take the right first steps, but serious water damage needs more than towels, fans, and hope. Start with safety. Stop the water. Document the damage. Remove standing water. Dry the structure. Clean the area. Then repair only after the space is fully dry.
If your Arlington home or business has water damage, call VIP Restoration Services at 240-370-6634 for professional help. Their team can inspect the damage, remove water, dry affected areas, and help you protect your property from bigger problems.
Frequently Asked Questions
Q: How fast should water damage restoration begin?
A: It should begin as soon as the area is safe. The sooner water is removed and materials are dried, the lower the risk of mold and structural damage.
Q: Can I do water damage restoration myself?
A: You can handle minor clean water spills, but larger leaks, sewage water, soaked drywall, wet flooring, or hidden moisture should be handled by professionals.
Q: How long does water damage restoration take?
A: Minor drying may take a few days. Larger jobs with damaged materials, repairs, or contamination can take longer depending on the severity.
Q: What is the most important part of water damage restoration?
A: Proper drying is one of the most important steps. If moisture remains behind walls or under floors, mold and long-term damage can follow.
Q: When should I call a water damage restoration company?
A: Call when water spreads beyond a small area, reaches building materials, smells bad, involves sewage, causes visible damage, or creates mold concerns.

